Fin Sync Pro
A personal-finance mobile app with a Laravel backend and admin panel. This guide takes you from the downloaded files to a published app.
1. Overview
The package has two parts:
- Backend and admin panel (
main/backend-and-admin-panel): a Laravel 13 application. It serves the mobile app's API and a web admin panel, and sends scheduled push notifications. - Mobile app (
main/mobile-app): a Flutter app for Android and iOS.
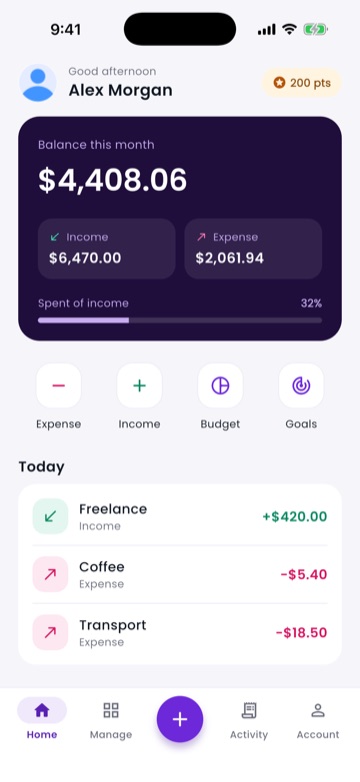
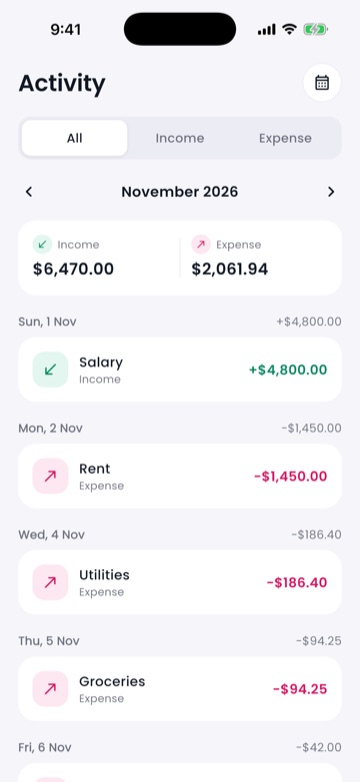
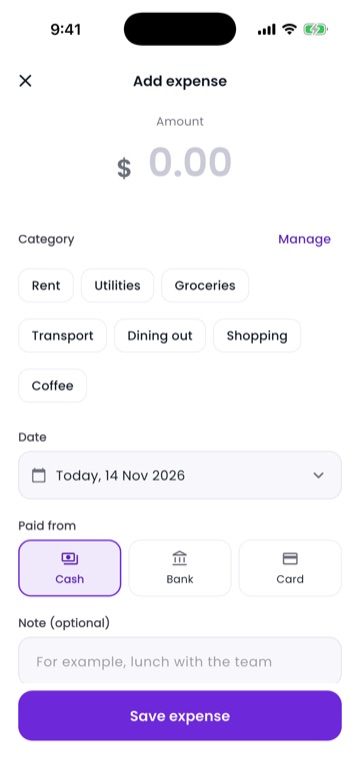
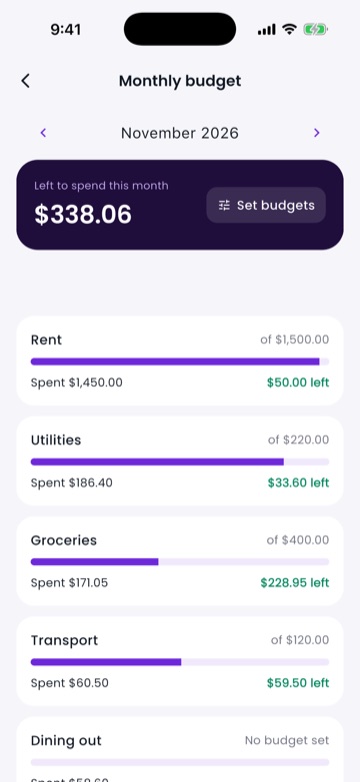
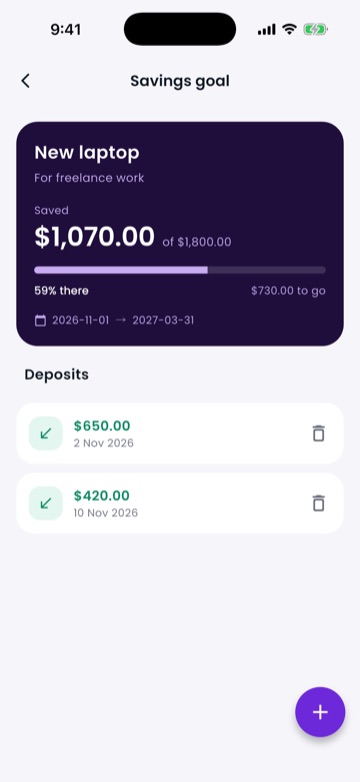
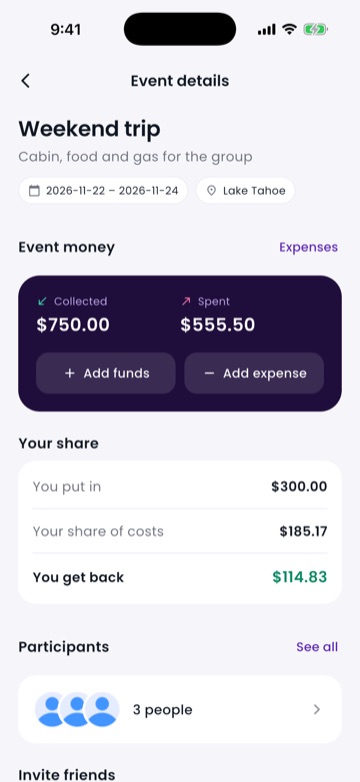
Features: income and expenses with categories, monthly budgets, savings goals, reminders, shared events with expense splitting, reports and charts, push notifications, Google sign-in, optional AdMob ads, and a points system (spin wheel, rewarded ads, unlockable features).
Do things in this order: install the backend (section 3), set up Firebase (section 5), point the app at your backend (section 6), then rebrand (section 7).
1.1 What's in the download
| Folder | Contents |
|---|---|
documentation/ | This guide. |
main/backend-and-admin-panel/ | The Laravel API, the admin panel and the web installer. Install this first. |
main/mobile-app/ | The Flutter app for Android and iOS. |
licensing/ | License notes and credits for every third-party package, font and library. |
1.2 The app
2. Requirements
Backend server
- PHP 8.3 or newer with the
curl,dom,fileinfo,mbstring,openssl,pdo_mysql,sodium,tokenizerandxmlwriterextensions, plus PHP's usual defaults.composer check-platform-reqslists exactly what is missing - MySQL or MariaDB, in a version supported by Laravel 13
- Apache or Nginx with the web root set to the
publicfolder - An HTTPS certificate. Release builds of the app refuse plain
http:// - The ability to add a cron job (for push notifications)
- Composer if you install from source instead of a prepared package
Your computer (for the app)
- Flutter 3.47 or newer (Dart 3.13). Check with
flutter --version - The app runs on Android 7.0 (API 24) or newer and iOS 15 or newer. The minimum Android version is set in
android/app/build.gradle.kts(minSdk). - Android Studio for Android builds; a current Xcode and CocoaPods for iOS builds (macOS only)
- A Firebase account, and developer accounts for Google Play and the Apple App Store when you publish
3. Install the backend
3.1 Upload and prepare
- Upload the
backend-and-admin-panelfolder to your server. - Point your domain's document root at
backend-and-admin-panel/public. Do not expose the folder above it. - Install the PHP packages, from inside
backend-and-admin-panel:composer install --no-dev --optimize-autoloader - Make these writable by the web server user:
storage,bootstrap/cache,public, and thebackend-and-admin-panelfolder itself (the installer creates the.envfile there). Do not create.envyourself.chmod -R ug+rwX storage bootstrap/cache public chmod ug+w . - Create an empty MySQL database and a user that can use it. The installer refuses a database that already has tables, so it never overwrites data.
3.2 Walkthrough: shared hosting with cPanel
Follow this if your host gives you cPanel. The screens can look slightly different on your host, but the names are the same. Replace yourdomain.com with your own domain.
Step 1. Create the database
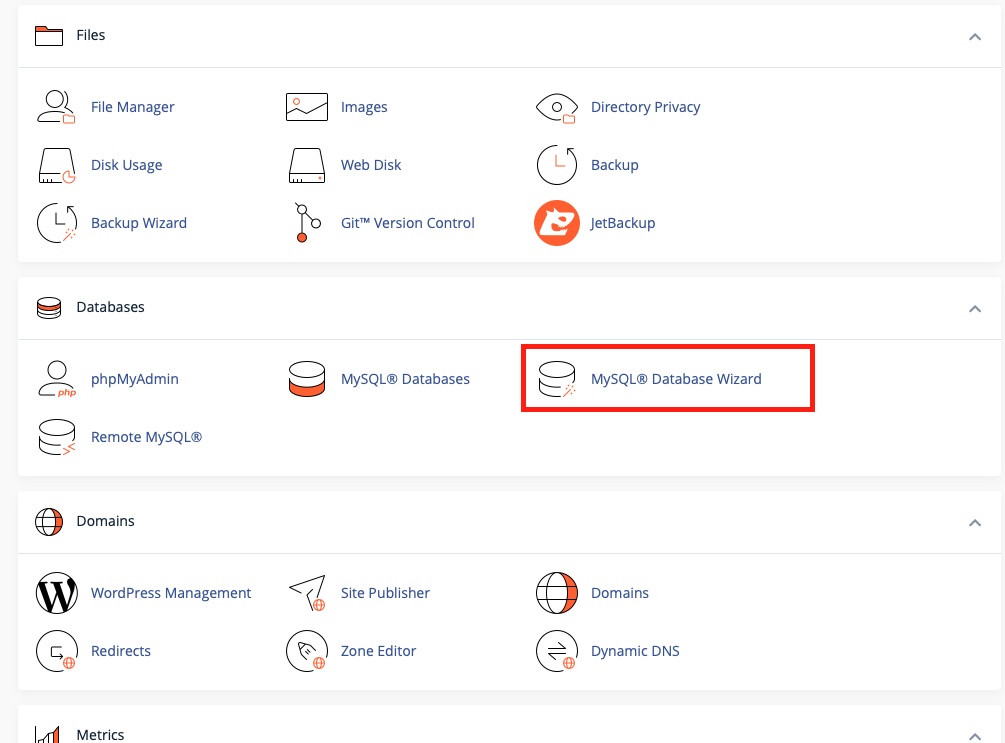
On the cPanel home page, open MySQL® Database Wizard in the Databases section.
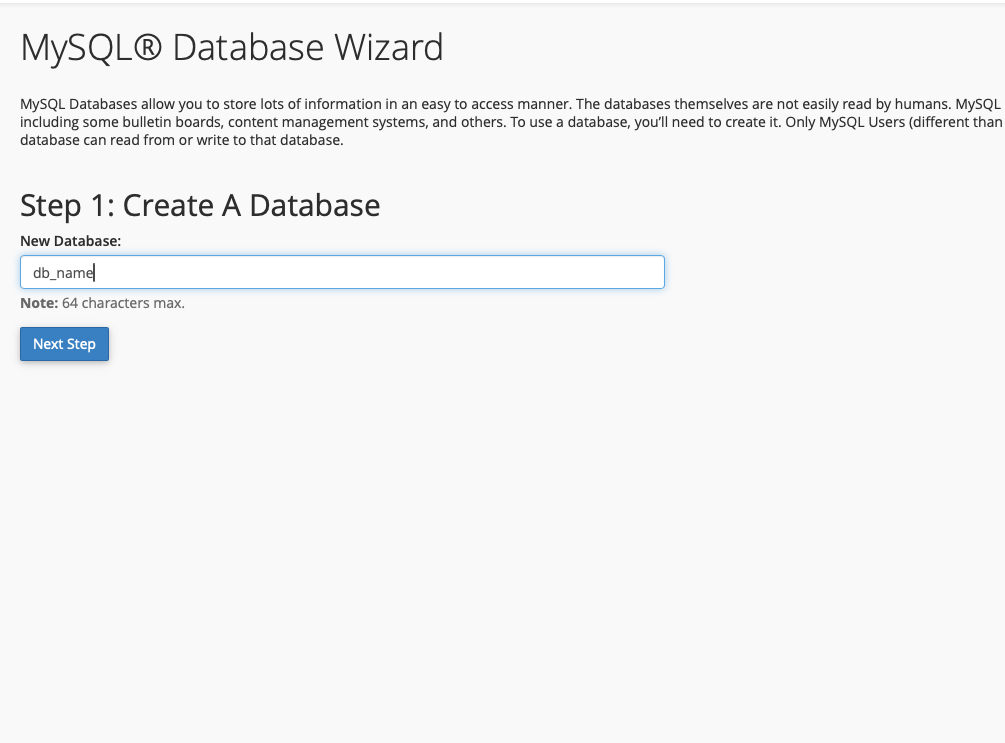
Type a database name and press Next Step. cPanel adds your account name in front, so the full name looks like account_dbname. Write down the full name.
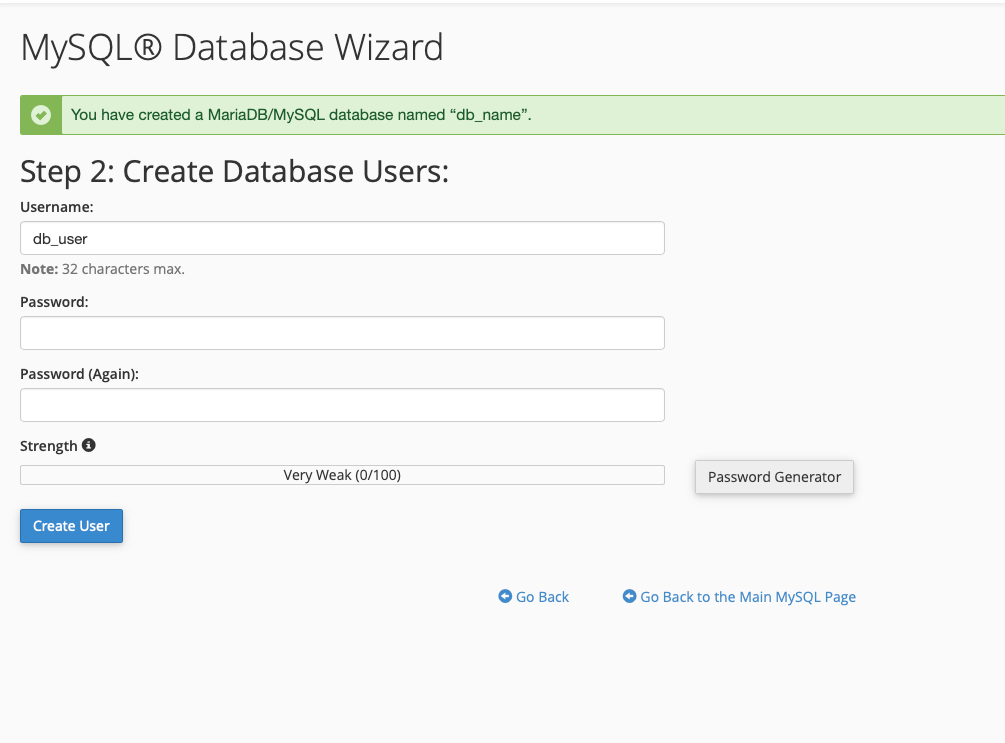
Step 2. Create the database user
Choose a user name and a strong password (the Password Generator button makes one). Press Create User and write down the full user name and the password: the installer asks for both. Do not use root; shared hosting does not allow it.
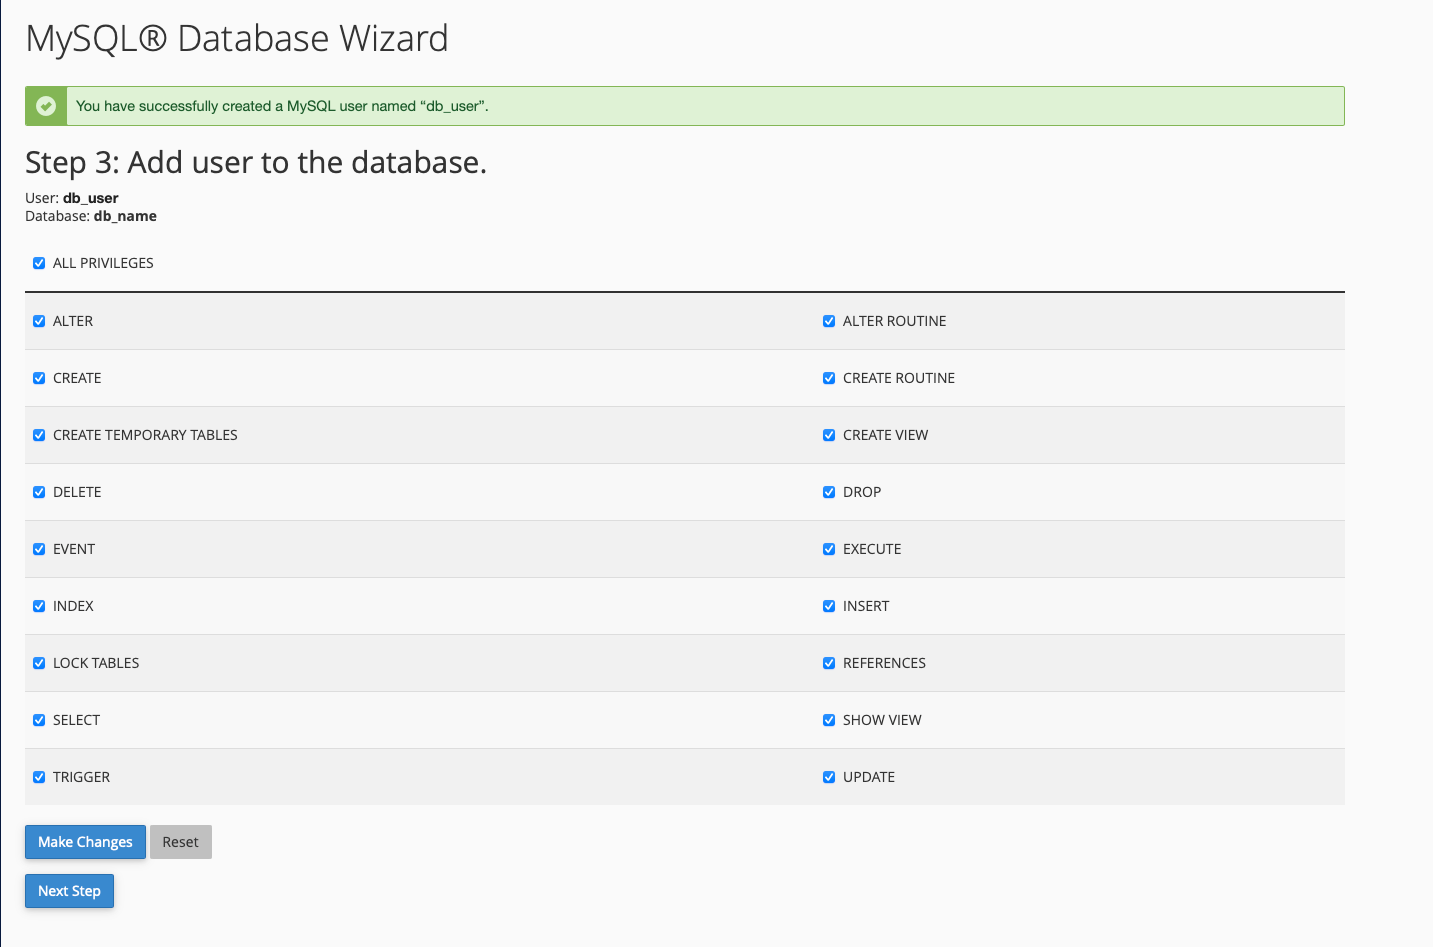
On the next screen tick ALL PRIVILEGES and press Make Changes, then Next Step.
Step 3. Choose the PHP version
Open MultiPHP Manager (or Select PHP Version), choose your domain and set PHP 8.3 or newer. In Select PHP Version, also tick the extensions listed in section 2 (curl, dom, fileinfo, mbstring, openssl, pdo_mysql, sodium, tokenizer, xmlwriter). The installer's first step shows anything still missing.
Step 4. Upload the files
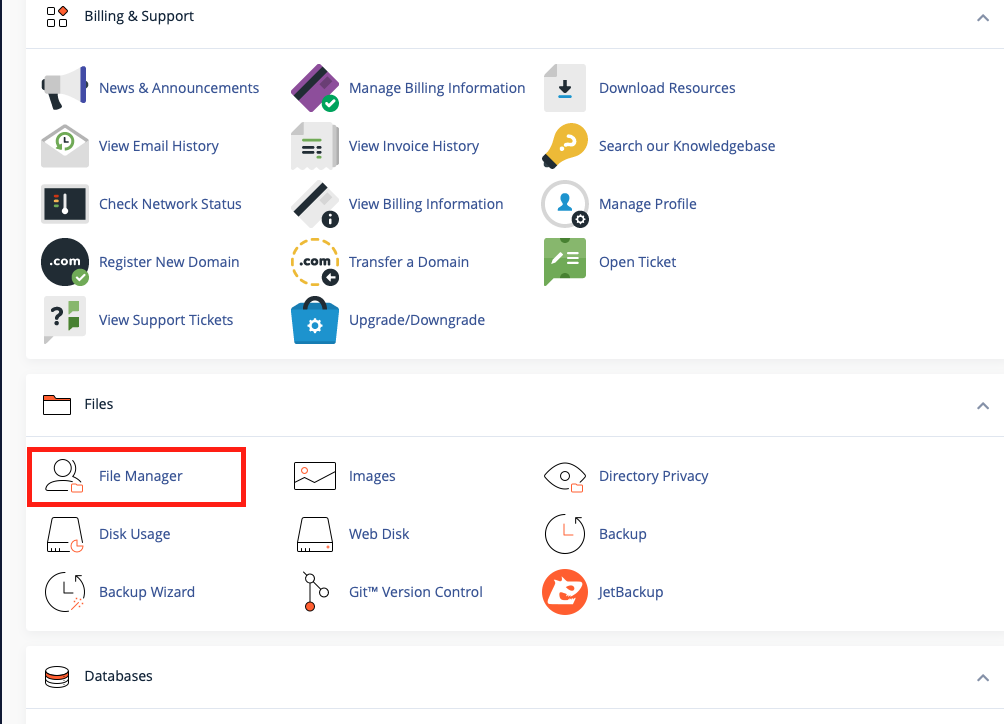
On your computer, open main/backend-and-admin-panel from the download and make a ZIP of what is inside it (the app, public and other folders, not the folder above). Then go back to the cPanel home page and open File Manager.
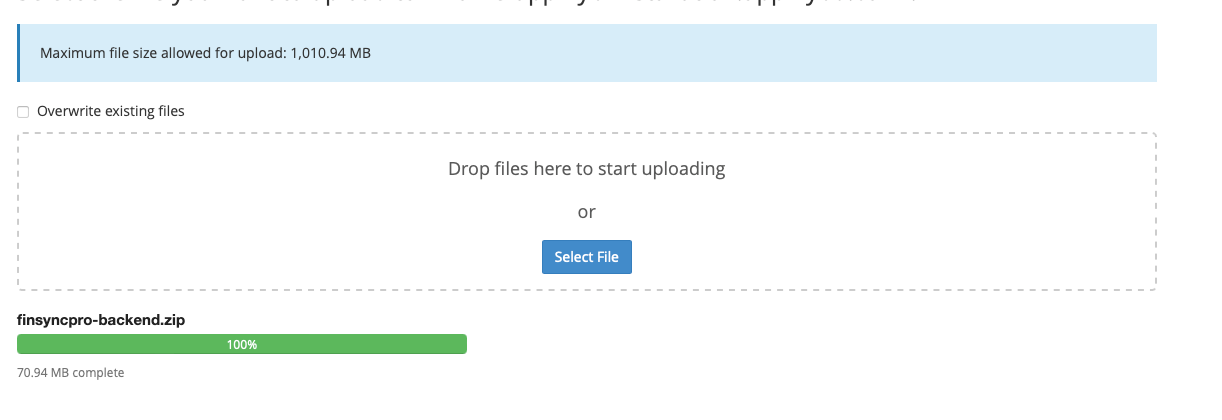
Open the folder for your domain (for a main domain this is usually public_html; for an add-on domain or subdomain it is the folder you chose when you created it). Press Upload and add your ZIP.
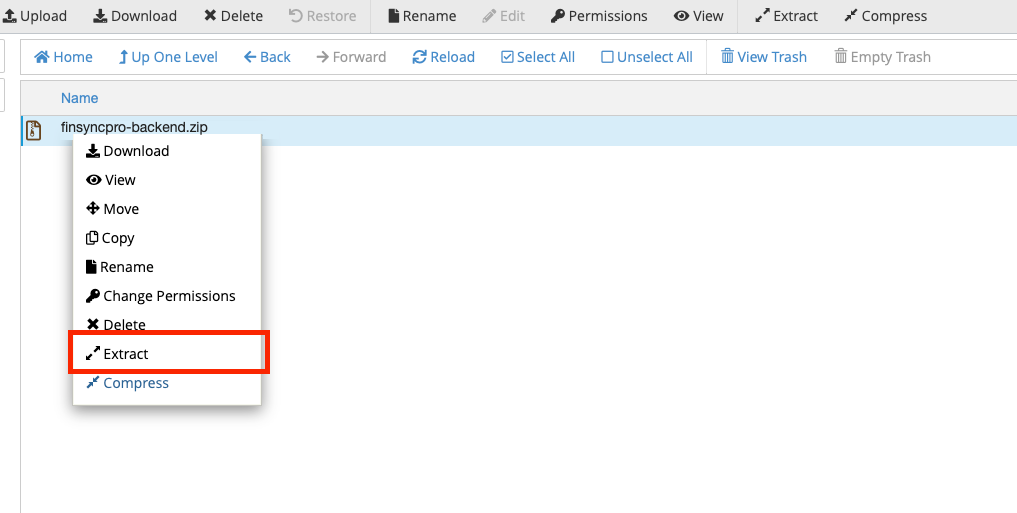
Right-click the uploaded file and choose Extract.
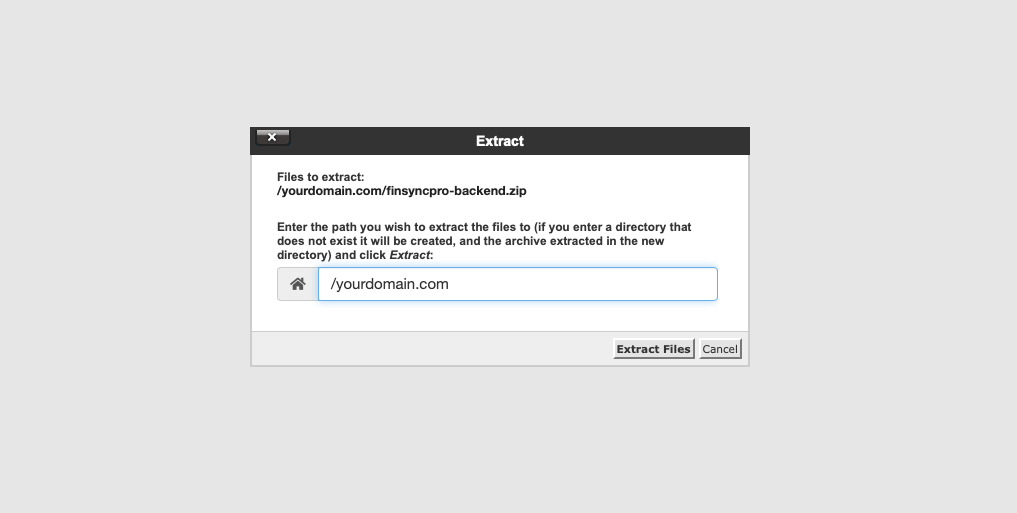
Confirm the folder and press Extract Files. When it finishes, delete the ZIP file.
If the files ended up inside an extra folder, open it, press Select All, then Move them up to the domain folder.
Step 5. Install the PHP packages
The download has no vendor folder. Use one of these:
- cPanel Terminal (Advanced section), if your host offers it:
cd ~/yourdomain.com(orcd ~/public_html), then runcomposer install --no-dev --optimize-autoloader. - On your computer: run the same command in
backend-and-admin-panelbefore you make the ZIP in Step 4, so the ZIP includesvendor.
Step 6. Point the domain at the public folder
The web address must open the public folder, not the folder above it. In cPanel open Domains, press Manage next to your domain and set the Document Root to the public folder (for example public_html/public). If your cPanel does not let you change the document root, ask your host to do it, or create a subdomain whose document root is that folder.
public holds your settings, code and database details. If the document root is the project folder, visitors could download them.Step 7. Run the installer and set up the cron job
- Make sure
storage,bootstrap/cacheandpublicare writable (in File Manager: right-click, Change Permissions,775). Do not create.envyourself. - Turn on HTTPS for the domain (SSL/TLS Status, Run AutoSSL).
- Open
https://yourdomain.com/install/and follow section 3.3. Enter the full database name, user name and password from Steps 1 and 2, with hostlocalhost. - Open Cron Jobs, choose Once Per Minute and add this command (use the PHP path your cron page shows as an example, such as
/usr/local/bin/ea-php83, and the real path to your folder):/usr/local/bin/ea-php83 /home/youraccount/yourdomain.com/artisan schedule:run >> /dev/null 2>&1
3.3 Run the web installer
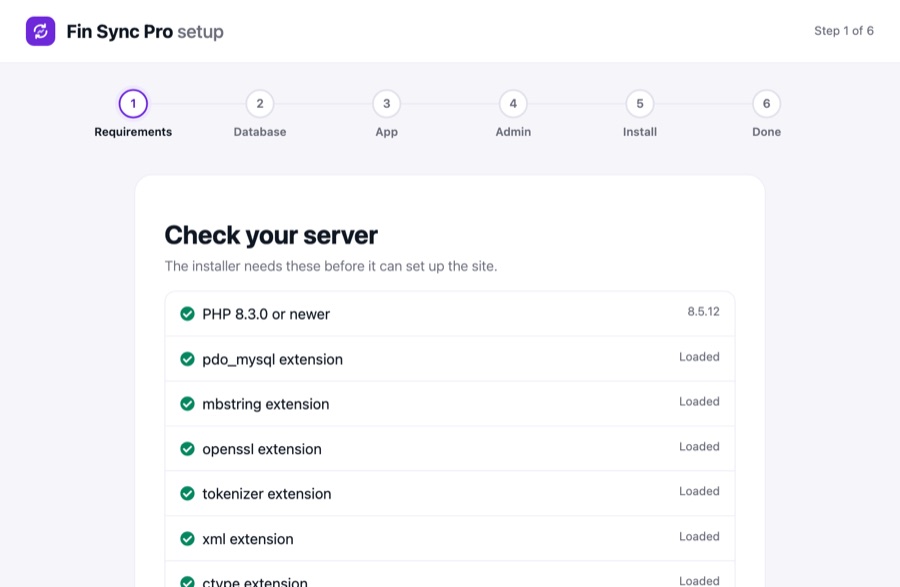
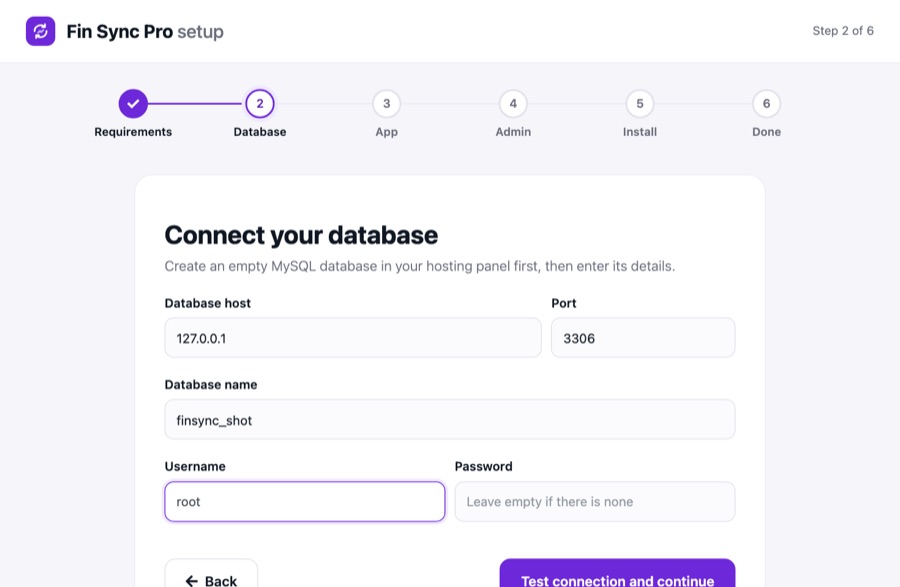
Open https://your-domain/install/ (opening https://your-domain before installing takes you there too) and follow the six steps:
| Step | What to do |
|---|---|
| 1. Requirements | The installer checks PHP 8.3+, the PHP extensions, the Composer packages (vendor/) and the folders it must write to. Fix anything marked red (each line says how), then press Check again. |
| 2. Database | Enter the host (usually localhost), port, database name, user and password. The installer tests the connection and checks that the database is empty. |
| 3. App | Enter your app name, your site address and a brand color. These appear in the admin panel and the mobile app; you can change them later in Settings, Branding. Choose Live site for a real server. |
| 4. Admin | Enter your name, email and a password of at least 8 characters. This is the only admin account; there is no default one. |
| 5. Install | Check the summary and press Install now. The installer writes .env (with a new application key and APP_DEBUG=false), creates the tables, applies the latest updates, saves your branding and admin account, and links public storage. |
| 6. Done | Press Open the admin panel and sign in with the email and password from step 4. |
No purchase code is needed, and the installer makes no outside web requests.
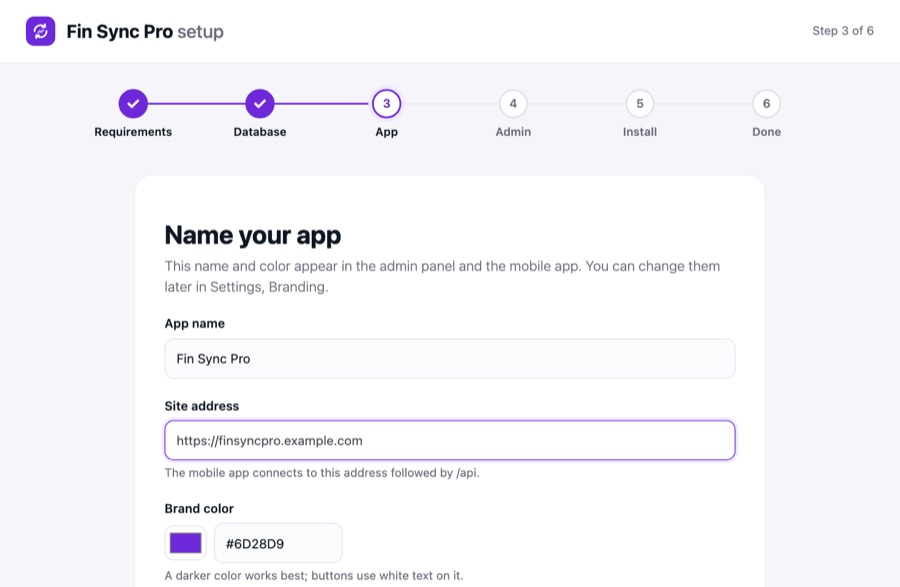
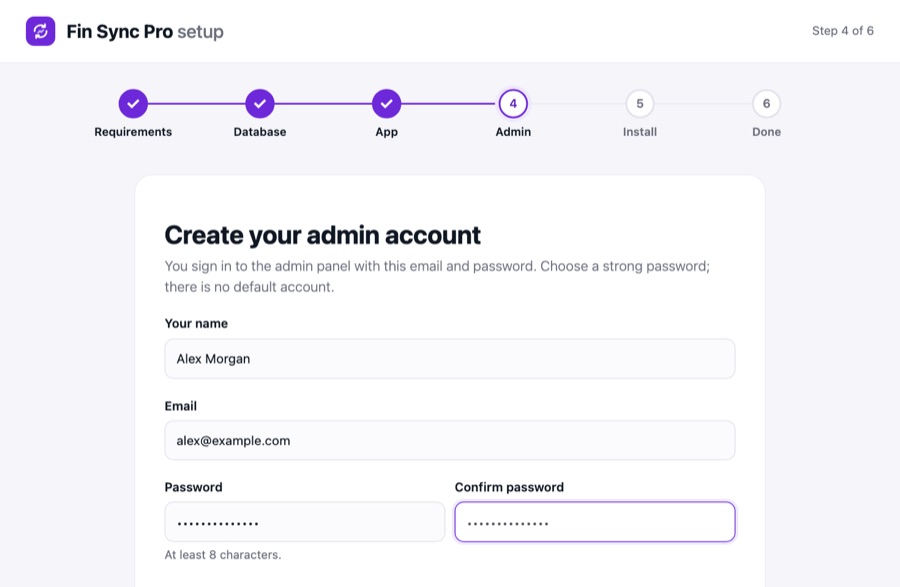
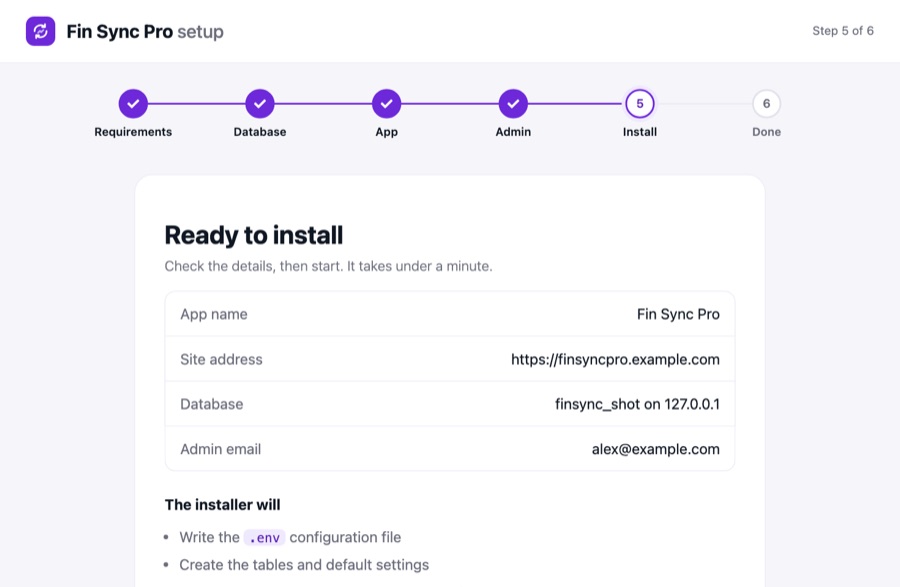
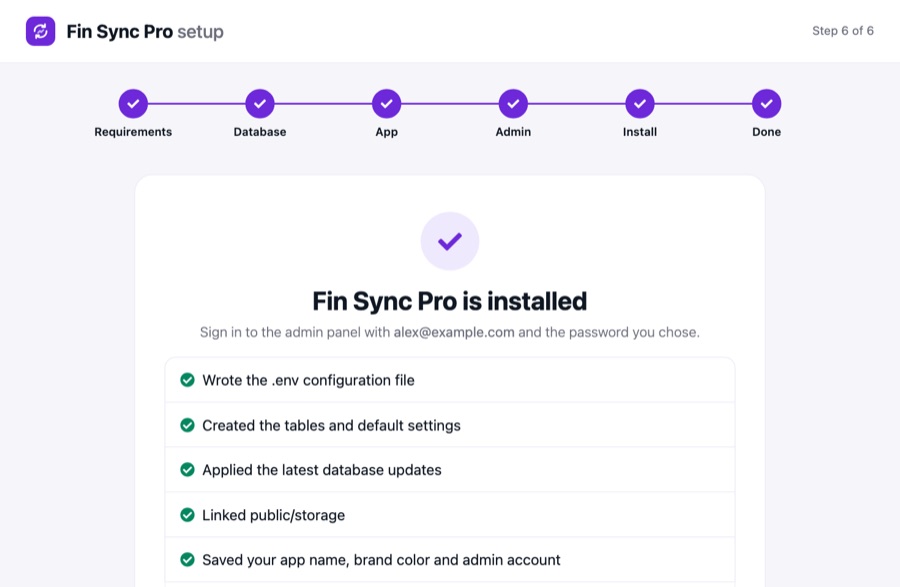
storage/installed.lock. To install again, delete that file and .env, and use an empty database. After installing you can delete the public/install folder..env.example to .env, fill in the database details and set APP_INSTALLED=true. Then, in the backend folder, run php artisan key:generate, php artisan migrate --force, php artisan db:seed --class=DefaultDataSeeder --force and php artisan storage:link. Create your admin with php artisan tinker, or add a row to the users table with a bcrypt password, and set your app name and brand color in the admin panel under Settings, Branding.APP_DEBUG=false on a live server, because debug pages reveal secrets.3.4 Your API address
The mobile app talks to https://your-domain/api. You will enter this in section 6.
4. After installing
4.1 Cron job (required for notifications)
Add one cron entry that runs Laravel's scheduler every minute. Replace the path with yours:
* * * * * cd /path/to/backend-and-admin-panel && php artisan schedule:run >> /dev/null 2>&1Without it no reminders or daily notifications are sent. The jobs and their times are listed in section 12.
4.2 Firebase service account (required for push and Google sign-in)
The backend verifies Google sign-in tokens and sends push notifications with a Firebase service-account key. Create it as described in section 5.3, then upload it in the admin panel: Settings, Integrations, Firebase, Upload key. The panel checks that it is a service-account key, stores it outside the public folder (storage/app/firebase/), and shows the project it belongs to.
If you prefer, keep the file anywhere outside the web root and set its full path in .env instead. An uploaded key takes priority.
FIREBASE_CREDENTIALS=/full/path/to/your-key.jsonpublic, and never share it. If it leaks, delete the key in the Firebase console and create a new one.4.3 Mail settings
In the admin panel open Settings, System settings, Email and fill in the mail host, port, encryption, user name, password, driver and from address. The password-reset email uses these.
4.4 Other settings
- Privacy policy and account deletion page: Settings, Pages and policies. Both stores require a public privacy policy; the app and the stores link to these pages.
- Google sign-in: the Allow Google sign-in switch in System settings shows or hides the Google button.
- Ads and points: see sections 8 and 11.
4.5 Sample data and a public demo (optional)
To fill a test site with sample data, run this on the server, from the backend folder:
php artisan db:seed --class=DemoSeederIt creates the app user [email protected] (user ID demo, password demo1234, or the value of DEMO_USER_PASSWORD in .env) with four months of income and spending, budgets, reminders, savings goals and a shared event. Running it again resets that data. On a live site the seeder refuses to run unless DEMO_MODE=true is set in .env.
To run a public demo for your own customers, also set these in .env:
DEMO_MODE=true
DEMO_ADMIN_PASSWORD=choose-a-password-you-are-happy-to-show
Then run the seeder once and keep the cron job from 4.1 running. In demo mode:
- the admin panel can be browsed but not changed: saving, deleting and sending show "This is a demo, so changes are turned off";
- the sign-in page shows the demo admin login (
[email protected]and yourDEMO_ADMIN_PASSWORD) with a Fill in button; - the demo app user can add and edit their own entries but cannot change or delete the account;
- the demo data is restored every hour.
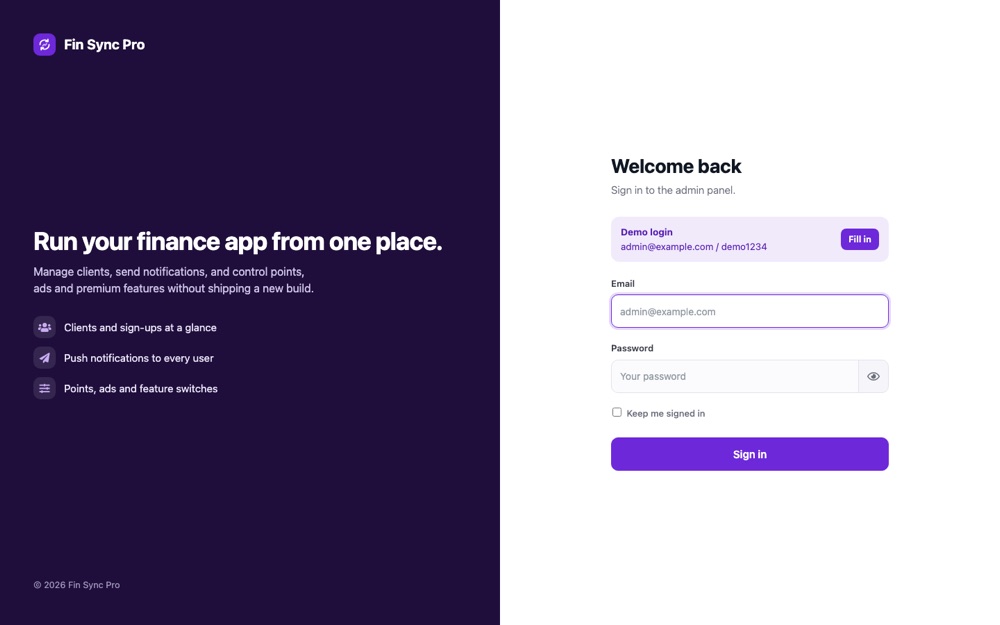
DEMO_MODE on a real site: it makes the admin panel read-only and shows a login on the sign-in page.5. Firebase
Create your own Firebase project. Do not ship the sample project's files.
5.1 Create the project and apps
- In the Firebase console create a project.
- Add an Android app using your Android package id, and an iOS app using your iOS bundle id (see section 7 for where to choose them).
- Download
google-services.jsonintomobile-app/android/app/andGoogleService-Info.plistintomobile-app/ios/Runner/, replacing the sample files. - Regenerate the Dart options file from inside
mobile-app:
This rewritesdart pub global activate flutterfire_cli flutterfire configurelib/firebase_options.dart.
5.2 Turn on Google sign-in
- In Firebase open Authentication, then Sign-in method, and enable Google.
- Add your Android app's SHA-1 and SHA-256 fingerprints in Project settings (debug and release keys).
- Copy the Web client ID shown under the Google provider and put it in
mobile-app/lib/utils/constant.dartasConstants.clientId.
5.3 Create the backend key
- In Firebase open Project settings, then Service accounts, and choose Generate new private key.
- Upload the downloaded file in Settings, Integrations (section 4.2).
5.4 Push notifications on iOS
Upload your APNs authentication key in Firebase under Project settings, Cloud Messaging, and enable the Push Notifications and Background Modes (remote notifications) capabilities in Xcode.
6. Run the app
https://finsyncpro.shahriarsagor.com/api), so it runs at once with a plain flutter run. Before you build for your customers, set your own API address as shown below, or the app will keep talking to the demo.- From inside
mobile-appfetch the packages:flutter pub get - Create your settings file:
Edit it so it holds your API address:cp config/app.example.json config/app.json{ "API_BASE_URL": "https://your-domain/api" }config/app.jsonis ignored by git, so your address is not committed. - Run:
Without the option the app uses the demo address fromflutter run --dart-define-from-file=config/app.jsondefaultApiBaseUrlinlib/utils/app_config.dart; with it, yourconfig/app.jsonaddress takes priority. You can also type your own address intodefaultApiBaseUrland run without any option. In Android Studio pick the Fin Sync Pro run configuration, and in VS Code the Fin Sync Pro launch entry. Both already add this option.
Try the app before your server is ready
You do not need to set anything to try it: with no address given, the app uses the demo server. Sign in with [email protected] and demo1234. The demo data is restored every hour and the demo may be offline at times. An app that points at the demo server will not work for your users, so set your own address before you publish.
API address rules
- A trailing slash is fine; it is removed for you.
- Release builds need
https://. The app stops at startup with an error message that names the problem and shows a corrected example. - Debug builds on Android also accept
http://so you can test against a local server. From the Android emulator, your computer'slocalhostishttp://10.0.2.2:8000/api. - The iOS simulator blocks plain
http://. Use anhttps://tunnel address, or temporarily add theNSAllowsLocalNetworkingkey toios/Runner/Info.plistand remove it before release.
7. Rebrand
From the admin panel, no rebuild needed: open Settings, Branding to set the app name, brand color and logo (square PNG, JPG or WebP). The admin panel changes at once, and the mobile app picks them up the next time it opens. The panel refuses colors too light for white button text.
In the app project, needs a new build: the home-screen icon, splash screen, the name under the icon, package IDs and the Firebase and AdMob app files. Change every item below before publishing. The values currently in the project belong to the sample app.
| What | Where | Notes |
|---|---|---|
| App name | android/app/src/main/AndroidManifest.xml (android:label); ios/Runner/Info.plist (CFBundleDisplayName, CFBundleName) | Currently "Fin Sync Pro". |
| Android package id | android/app/build.gradle (applicationId) | Currently com.codercamp.smartfintechmanager. Choose yours before creating the Firebase app, and never change it after publishing. |
| iOS bundle id | Xcode, Runner target, Signing and Capabilities | Match it to the Firebase iOS app. |
| Firebase files | android/app/google-services.json, ios/Runner/GoogleService-Info.plist, lib/firebase_options.dart | Section 5. |
| Google web client ID | lib/utils/constant.dart (Constants.clientId) | Section 5.2. |
| AdMob app IDs | AndroidManifest.xml (com.google.android.gms.ads.APPLICATION_ID); Info.plist (GADApplicationIdentifier) | Currently Google's public test IDs. |
| Brand color, name and logo inside the app | Admin panel, Settings, Branding | No rebuild. The app reads them from the server and remembers them. The built-in default is BrandTheme.defaultColor in lib/utils/brand_theme.dart (Royal violet #6D28D9); the icon and splash use that default until you regenerate them. |
| Logo, icon and splash | lib/common/brand_mark.dart, then run the commands below. | See the box below. |
| iOS tracking text | ios/Runner/Info.plist (NSUserTrackingUsageDescription) | Shown by the iOS tracking prompt. |
| Backend name | Admin panel, System settings, App Name |
Logo, icon and splash screen
The logo is drawn in code (lib/common/brand_mark.dart) in your brand colors, so it stays sharp at every size. After you change the colors or the mark, render the icon and splash images, then generate the platform files:
flutter test tool/brand_assets_test.dart
dart run flutter_launcher_icons
dart run flutter_native_splash:create
To use your own logo artwork instead, replace the three images in assets/branding/ (1024×1024 PNG: icon_1024.png on a solid background, icon_foreground.png and logo_mark.png on transparent) and run only the last two commands. Also set adaptive_icon_background in pubspec.yaml to your color.
ios/Runner.xcodeproj/project.pbxproj and reformat ios/Runner/Info.plist. If that happens, restore those two files with git checkout (or from a backup); the icons themselves are already generated.8. Ads and consent
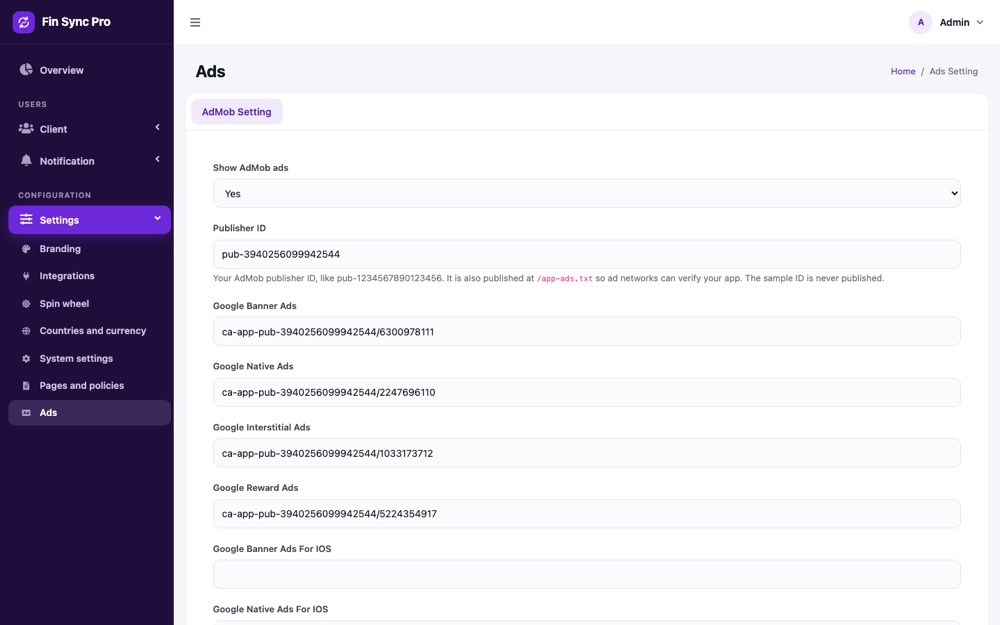
- Turn ads on or off in the admin panel under Settings, Ads (Show AdMob ads). Enter your AdMob publisher ID and your banner, native, interstitial and rewarded ad unit IDs for Android and iOS there. The app reads them from the API, so you do not rebuild the app to change them.
- Only AdMob is supported. The app does not show Facebook (Meta Audience Network) ads. To use Meta demand, add Meta as a mediation partner inside AdMob.
- Consent. Ads start only after the user signs in. The app first shows Google's consent form (only where the law requires it, such as the EEA and UK), then on iOS the tracking prompt, then starts the ads SDK once. If consent cannot be resolved, no ads are shown in that session. Where Google requires it, Account, Privacy options lets users change their choice. Set up the consent message in the AdMob console under Privacy & messaging.
- Rewarded ads. Points are granted only when the ad is watched to the end. To stop forged reward requests, turn on AdMob server-side verification: in the AdMob console set the rewarded ad unit's callback URL to
https://your-domain/api/admob/ssv, then run this on your database:
While it is on, only Google's signed callback grants points. Leave it atUPDATE system_settings SET value = '1' WHERE key_name = 'admob_ssv_enabled';0until the callback URL is set, or watching an ad will not earn points.
9. Release builds
Android
- Create an upload keystore. Run this from
mobile-app, answer the questions and choose a password (keep the file and its passwords safe and out of git):keytool -genkey -v -keystore android/upload-keystore.jks -keyalg RSA -keysize 2048 -validity 10000 -alias upload - Copy
android/key.properties.exampletoandroid/key.propertiesand fill in the same details. The defaultstoreFile=../upload-keystore.jksmatches the command above. The build reads this file on its own; without it, a release build is signed with the debug key and cannot go on Google Play. See also the Flutter Android guide. - Build the bundle for Google Play:
flutter build appbundle --dart-define-from-file=config/app.json
iOS
- Open
ios/Runner.xcworkspacein Xcode and set your team and bundle id. - Build and archive:
then upload with Xcode's Organizer, following the Flutter iOS guide.flutter build ipa --dart-define-from-file=config/app.json
Always pass --dart-define-from-file=config/app.json to release builds (or set defaultApiBaseUrl), or the app is built with the demo server address.
10. Store requirements
- Account deletion. Account, Delete account deletes the account and its data after the user confirms with their password (or by signing in with Google again). Apple and Google require this for apps that let people create accounts. Shared events keep their expenses for the other members; an event left with no members is deleted.
- Notification permission. The app does not ask at launch. After sign-in it shows a short sheet explaining the alerts, once, and asks the system only if the user taps Turn on alerts. Apple reviewers look for this.
- Privacy policy. Publish it in Pages and policies and enter its URL in both store listings.
- Data safety and privacy labels. Declare what the app collects: name, email, financial entries, device identifier for notifications, and advertising data if you enable ads.
- Points and unlockable features. Reminders, Savings Goals and Expense Split can be locked behind points. If your store review objects to unlocking features with points, set the matching ... are premium switch (System settings, Premium features) to off in System Setting: that feature is then free for everyone and shows no lock. (This needs the backend version that ships with this documentation.)
11. Admin panel
| Menu | What it does |
|---|---|
| Overview | Sign-ups today and this week, total, active and inactive clients, a 31-day sign-up chart, and today's spin-wheel activity. |
| Settings, System settings | App name; spin wheel spins per day; minutes between rewarded ads; points per ad view and per referral; the Google sign-in switch; mail settings; and for Reminders, Savings Goals and Expense Split a premium switch (off means free for everyone), the points needed to unlock, and the unlock length in days. |
| Settings, Ads | AdMob on/off, publisher ID and ad unit IDs (section 8). |
| Settings, Branding | App name, brand color and logo for the admin panel and the app. |
| Settings, Integrations | Upload the Firebase service-account key; record your AdMob app IDs. |
| Settings, Pages and policies | Privacy policy and account-deletion page text. |
| Client, All clients | Registered users; activate or deactivate an account. |
| Settings, Spin wheel | The point values and colors on the wheel. |
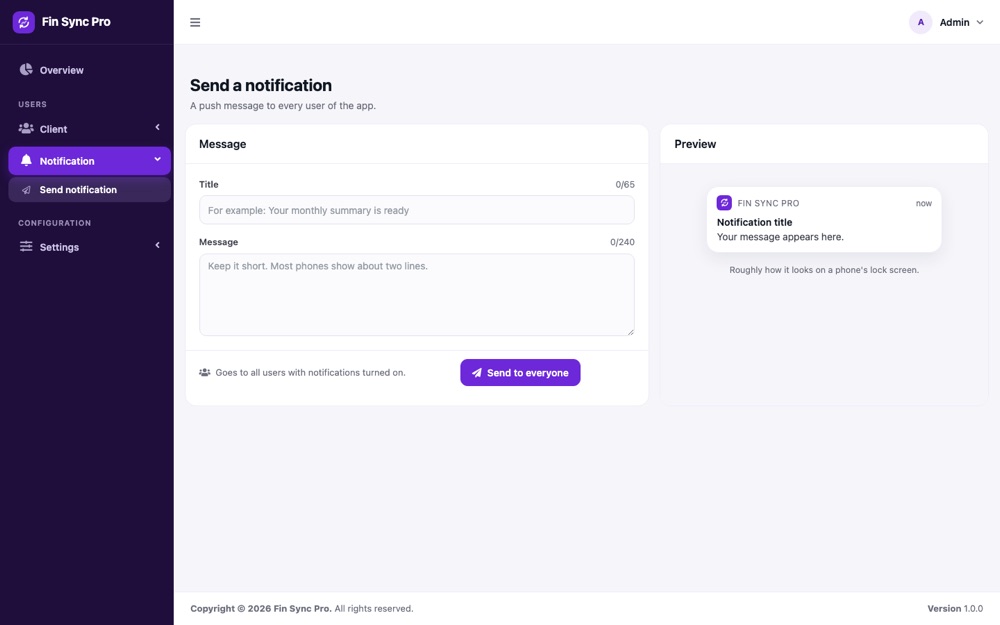
| Notification, Send notification | Send a message with a title and body to all users. |
| Settings, Countries and currency | The country and currency list shown at registration. |
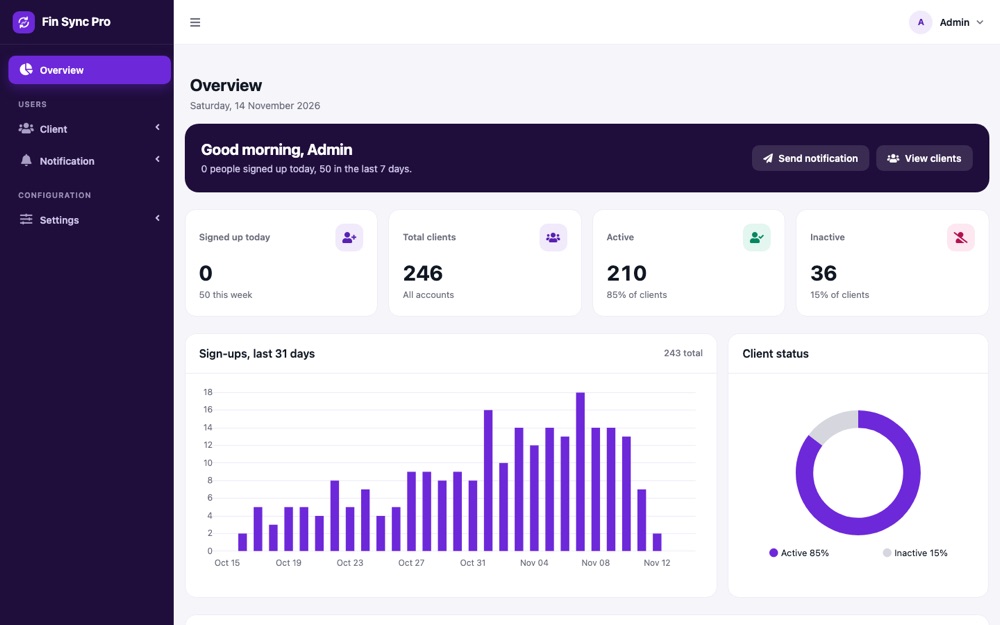
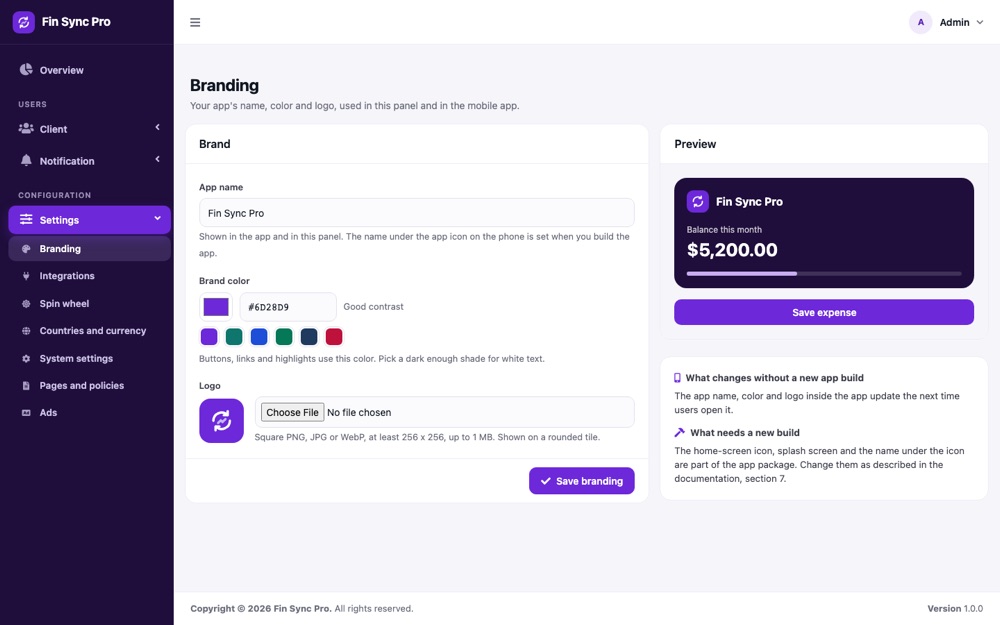
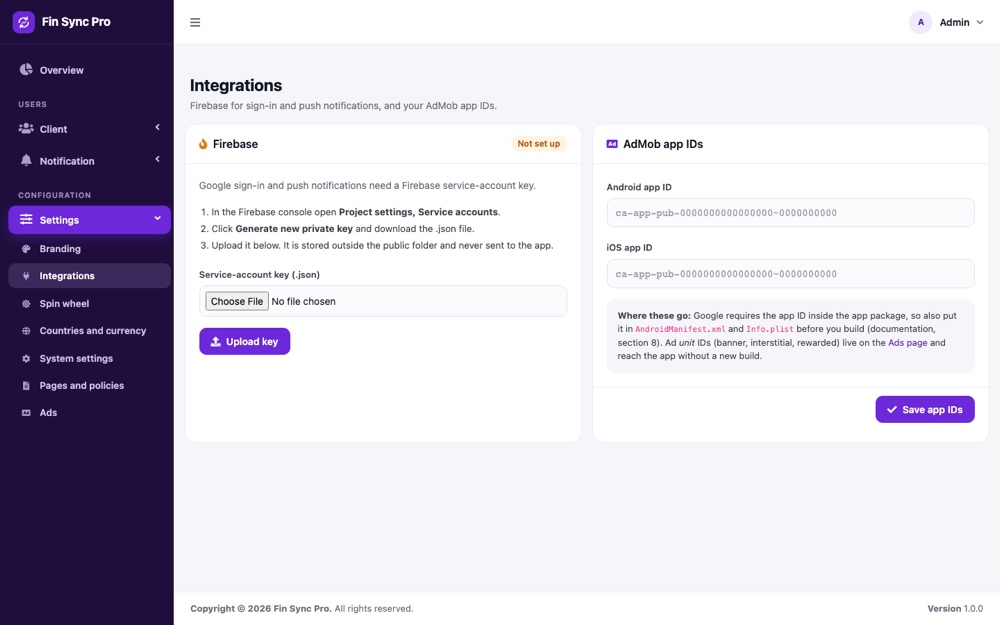
12. Scheduled jobs
These run from the cron entry in section 4.1. Times are in UTC, the backend's timezone setting (config/app.php).
| Time (UTC) | Job |
|---|---|
| 10:00 daily | Event reminders |
| 12:00 daily | Total budget reminder |
| 18:00 daily | Budget category reminder |
| 20:00 daily | Savings goal reminder |
| 21:00 daily | Daily reminder |
| 22:00 daily | Daily notification |
| 00:00 on the 2nd of each month | Copies the previous month's budgets to the new month |
List them any time with php artisan schedule:list.
13. Troubleshooting
| You see | Cause and fix |
|---|---|
| The app shows "Set your server address" | The address in config/app.json or defaultApiBaseUrl is not a full web address. The message on the screen names the problem and shows a corrected example (section 6). |
| The app opens but every screen fails to load | API_BASE_URL points at a server that is not running or is not your backend. Check that the address opens in a browser. |
config.invalid_base_url at startup | The address is empty or not a full web address. Use https://your-domain/api. |
config.insecure_base_url at startup | A release build was given http://. Use https://. |
| Installer: "This database already has tables" | Create a new, empty database (or empty this one in phpMyAdmin), then go back to step 2. |
| Installer: ".env can be written" is red | Give the web server user write access to the backend-and-admin-panel folder (section 3.1), or create an empty .env file with permission 666, then press Check again. |
| Sign-up shows no countries, or ads and rewards do nothing | The default settings and countries are missing from the database. Run php artisan db:seed --class=DefaultDataSeeder --force on the server. It only adds what is missing and keeps your data. |
| Installer: "Already installed" | The installer is locked. To reinstall, delete storage/installed.lock and .env (see section 3.3). |
| Blank page or 500 error on the backend | Check storage/logs/laravel.log, and that storage and bootstrap/cache are writable. |
| Profile photos do not show | Run php artisan storage:link and make sure public/storage exists. |
| Google sign-in fails | The Google provider is off in Firebase Authentication, the SHA fingerprints are missing, or Constants.clientId is not your web client ID. |
| Google sign-in: "Invalid or expired sign-in token" | The backend cannot read the service-account key. Check storage/app/firebase/firebase-adminsdk.json or FIREBASE_CREDENTIALS, and that it belongs to the same Firebase project as the app. |
No Firebase App '[DEFAULT]' has been created | firebase_options.dart or the Firebase files do not match your package id. Repeat section 5.1. |
| No push notifications | The cron entry is missing (section 4.1), the service-account key is missing, or on iOS the APNs key was not uploaded. |
| No ads appear | Consent was declined or unresolved, ads are off on the Ads page, or the ad unit IDs are wrong. |
| Watching a rewarded ad gives no points | Server-side verification is on but the callback URL is not set in AdMob (section 8), or the cooldown between ads has not finished. |
14. Credits and licenses
- The backend uses Laravel 13 (MIT license) and the packages listed in
composer.json. - The app uses Flutter and the packages listed in
pubspec.yaml, each under its own open-source license (see the license pages on pub.dev). Runflutter pub depsfor the full list. - Charts and calendars in the app use fl_chart and table_calendar (both free, open source). No paid or per-developer component license is needed.
- Admin panel: AdminLTE 3 (MIT), Bootstrap 4 (MIT), jQuery (MIT), Chart.js (MIT), Toastr (MIT) and Font Awesome Free (icons CC BY 4.0, fonts SIL OFL 1.1, code MIT). All are bundled in
public/; nothing loads from a CDN. - Font: Poppins (SIL Open Font License 1.1), bundled in
assets/google_fonts/with its license file. - The app and the backend are provided as source code for you to modify and publish under your own name, under the terms of the Envato license you purchased.
AI disclosure
AI tools were used to create this item. In detail:
| Part | AI used? | What was used |
|---|---|---|
| Source code (app and backend) | Yes | Written with the help of Claude (Anthropic) as a coding assistant, then reviewed, tested and run by the author. |
| This documentation | Yes | Drafted with the help of Claude (Anthropic) and checked by the author against the shipped code. |
| Graphics and listing images | Yes | The layouts of the listing images were written with the help of Claude (Anthropic). The app and admin screens in them are real screenshots with fictional sample data. |
| Explainer video (not part of the download) | Yes | Built from code with Remotion. The narration comes from the open-source Kokoro text-to-speech model, and the music is generated by a script. |
No AI service runs inside the product: the app and the backend never send data to an AI provider, and no AI account or key is needed.